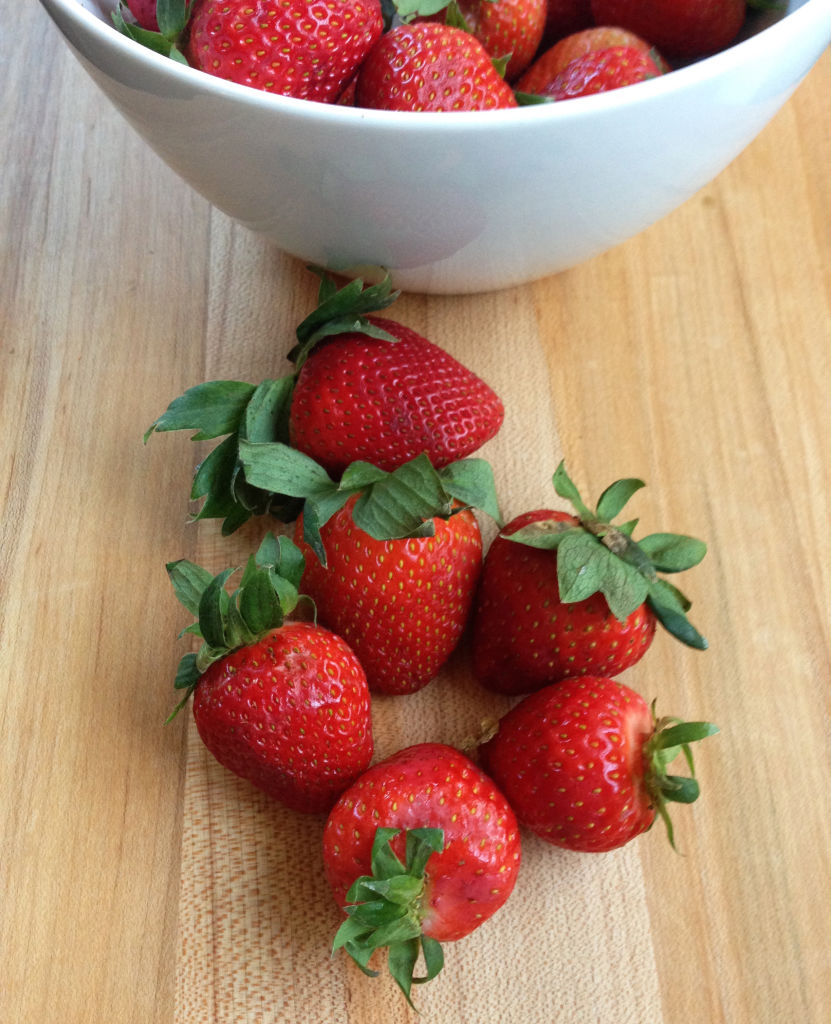
Archive - February 2015

Lemon Squares

This recipe came from my cousin, Meghan. She sent it to me saying I would love it, and she was right! These are absolutely delicious. I tend to gravitate toward chocolate desserts but I have a soft spot for lemon-related things too. Jason said he’d prefer more shortbread crust to the lemon, but I like them as they are. Next time I might 1.5x the crust ingredients and see how it goes.

Lemon Squares
(Recipe credit to thekitchn.com)
1/2 cup (1 stick) unsalted butter, softened and cut into chunks
1/2 cup powdered sugar
1 cup all-purpose gluten free flour (or regular flour)
3/4 cup almond meal
1/2 teaspoon salt

4 large eggs
4 large egg yolks
1 cup granulated sugar
Zest from 5 to 6 lemons
3/4 cup fresh-squeezed lemon juice (from 5 to 6 lemons)
1/4 teaspoon salt
1/2 cup (1 stick) unsalted butter, softened and cut into cubes

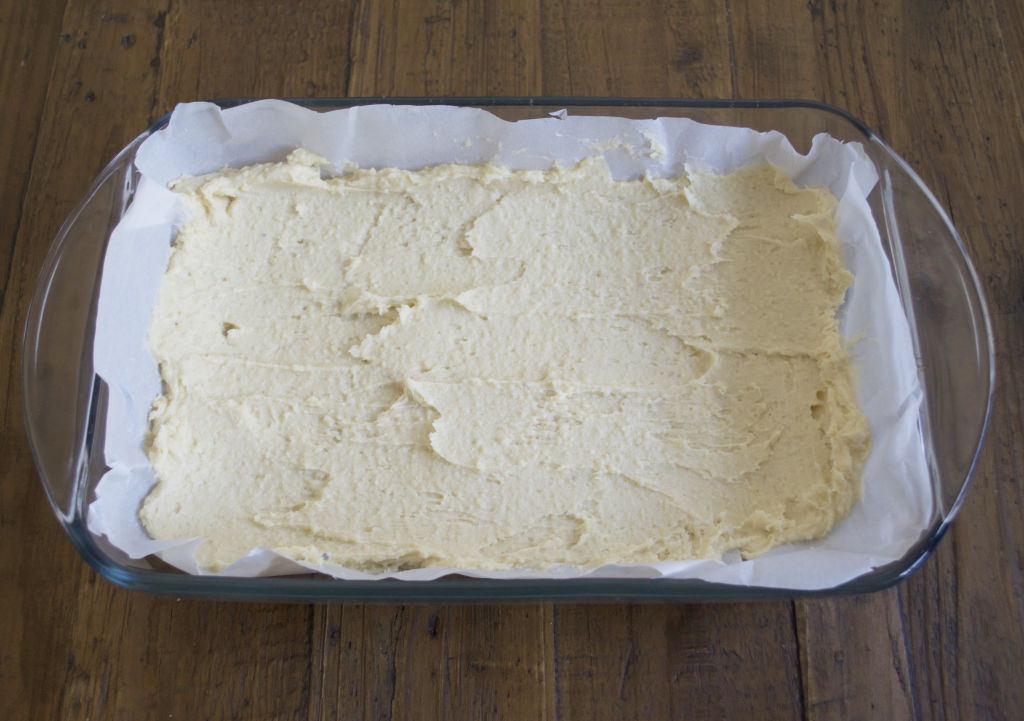
1. Place a rack in the middle of the oven and heat the oven to 350°F. Line an 8″x8″ or 8″x11″ baking dish with parchment paper (allowing it to go up the sides, not just the bottom).
2. To prepare the crust, beat together the butter and powdered sugar in a stand mixer (or with a hand mixer) on medium-high speed until they are completely combined and resemble creamy frosting. Stop the mixer and scrape down the sides of the bowl as needed while mixing.
DSC_0578 
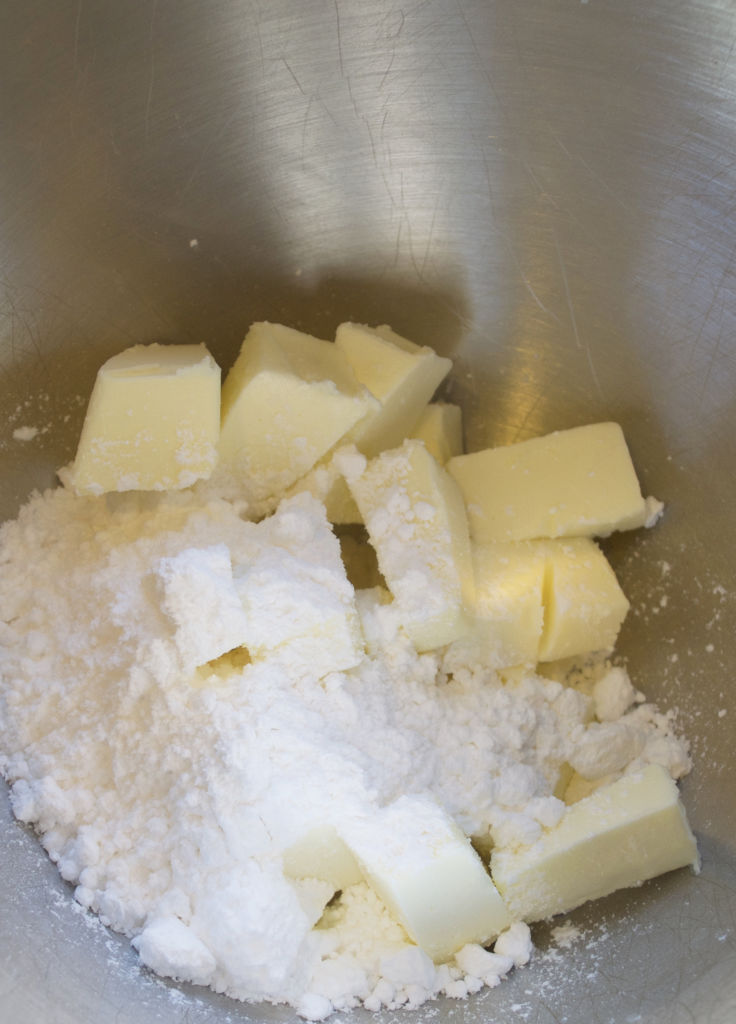
3. Add the all-purpose flour, almond flour, and salt to the bowl. Beat on low speed just until all the flour is incorporated and the mixture comes together into a dough.
4. Press the dough into the baking dish and make as compact as possible. Bake for 20 to 25 minutes, until the edges of the shortbread turn golden-brown.
DSC_05845. To prepare the lemon curd. Whisk together the eggs, yolks, and sugar in a small (2-quart) saucepan, then whisk in the lemon zest, lemon juice, and salt to form a smooth mixture. Set a small strainer over a mixing bowl and place next to the stove.DSC_0563 
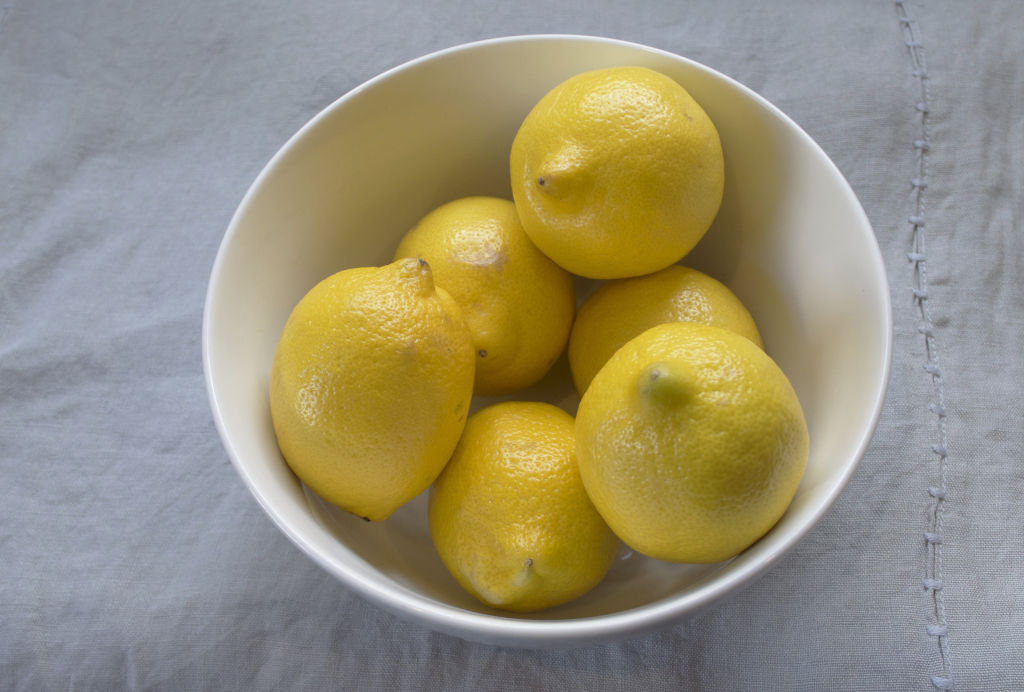
6. Place the pan with the lemon mixture over medium heat. Stir continuously for about 8 minutes until the mixture thickens and registers about 155°F.
7. Strain the heated mixture into the bowl, removing the zest and any clumps from the curd. While the curd is still warm, stir in the butter. Stir until the butter is completely melted.
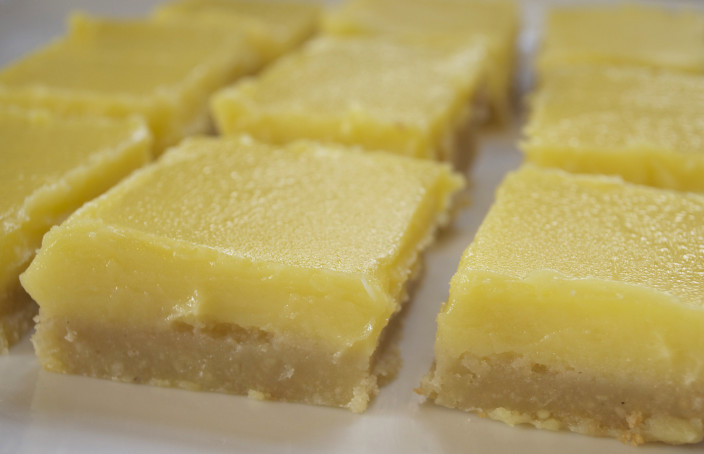
8. When the shortbread crust is ready, remove it from the oven and pour the curd over top. Bake at 350°F until the edges of the curd are set, but the middle is still jiggly, 10 minutes. Cool completely and refrigerate for at least 4 hours.DSC_0595
DSC_0685

His and Hers Pancakes + Homemade Whipped Cream

Jason and I were both craving pancakes this morning. He loves bananas and Nutella, I prefer strawberries and chocolate chips, so I made his with whole wheat batter and mine with gluten free batter. You can add any toppings to these batter recipes. I’ve used candied walnuts, pecans, blueberries, blackberries, and probably other things I’m not remembering now. Use whatever you prefer!  Each recipe below will make approximately 8 pancakes. I make the full recipe and save half for the next day.

IMG_5439

Whole Wheat Pancake Batter

1 cup whole wheat flour
1/2 teaspoon baking powder
1/4 teaspoon baking soda
2 tablespoons sugar
1/4 teaspoon salt
3/4 cup skim milk
1 egg, lightly beaten

1. Mix dry ingredients together.
2. Mix wet ingredients into the dry.
3. Heat nonstick frying pan and when hot, pour on portions of the pancake mix.
4. Before they start too cook too much, place the toppings onto the batter placed on the pan. Do not overcrowd each pancake with toppings. It’s important that when you flip them, there’s some space for the batter to coat the edges of the toppings.

IMG_5372

IMG_5347

Gluten Free Pancake Batter
1 cup gluten free all purpose flour (I use Bob’s Red Mill)
1 tablespoon flax seed meal
2 tablespoons sugar
2 teaspoons baking powder
1/4 teaspoon baking soda
1 teaspoon cinnamon
1 teaspoon vanilla extract
1/2 teaspoon salt
1/4 cup applesauce
3/4 cup skim milk

Same instructions as the whole wheat pancakes.
IMG_5388
IMG_5414

Homemade Whipped Cream 
1/2 cup heaving whipping cream
1 tablespoon sugar
1/2 teaspoon vanilla extract

1. Put all ingredients in the bowl of a stand up mixer.
2. Using whisk attachment, turn on high until cream begins to stiffen.
3. Pause the mixer, and use a spatula to mix the ingredients and make sure there isn’t sugar sticking to the bottom of the bowl.
4. Turn machine back on high and mix until peaks form.

IMG_5413

Cleaning Up Cast Iron Mistakes

We have to be creative with kitchen space here. There are a lot of stacked pots and Tetris-like cabinets in this household. About a month ago I emptied our dishwasher (this is the first time we’ve had one… not sure what I did in life before it.) and placed a pot on top of the only cast iron pan we have. When I went to use it a couple weeks later, I found it in this state…
IMG_5146 Whoops! The pan I placed on top of it must have been wet on the bottom. Here’s a step by step guide on how you can clean up any cast iron mistakes you’ve made in the past.

1. Use fine steel wool to remove rust from affected areas.
IMG_51492. Scrub the skillet until you can see the raw cast iron.IMG_5168 
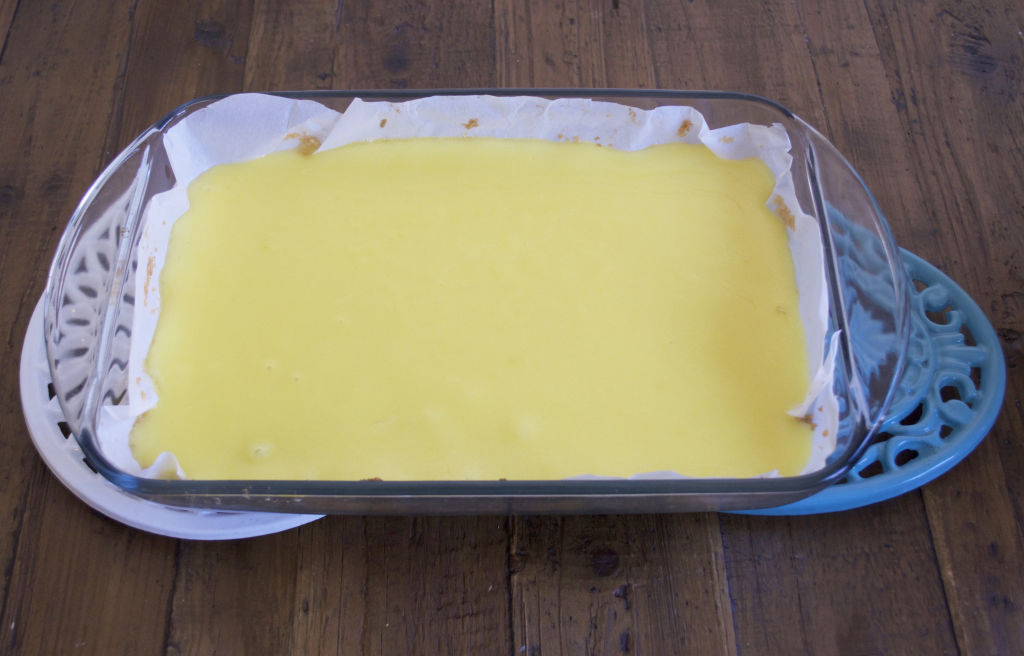
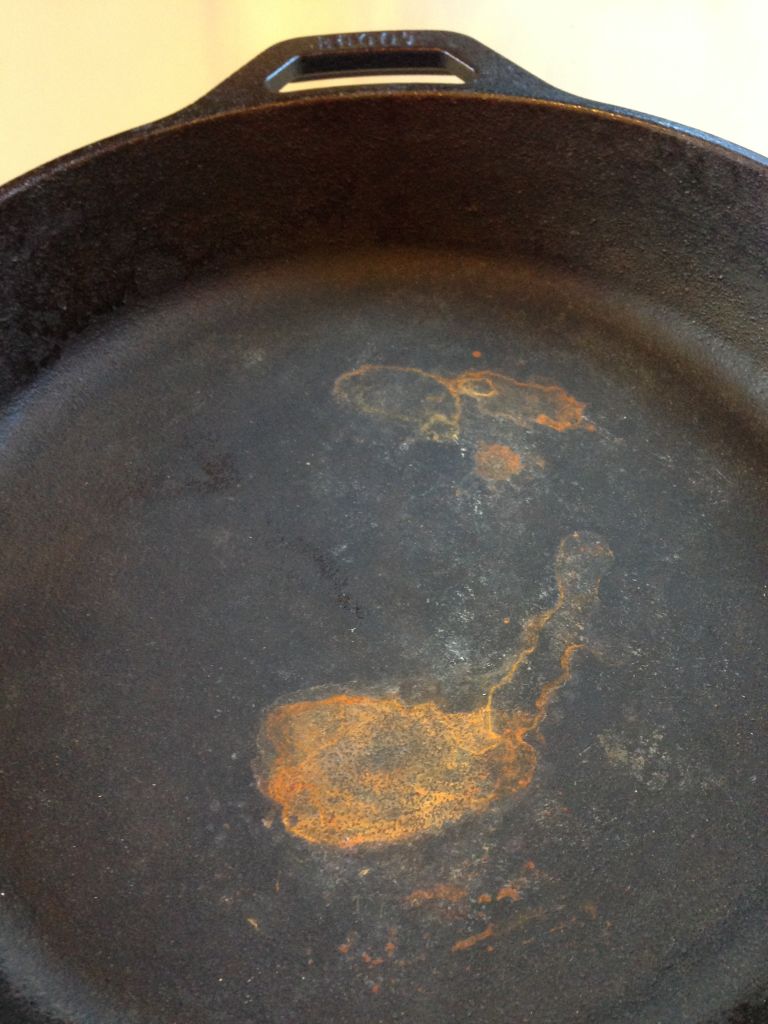
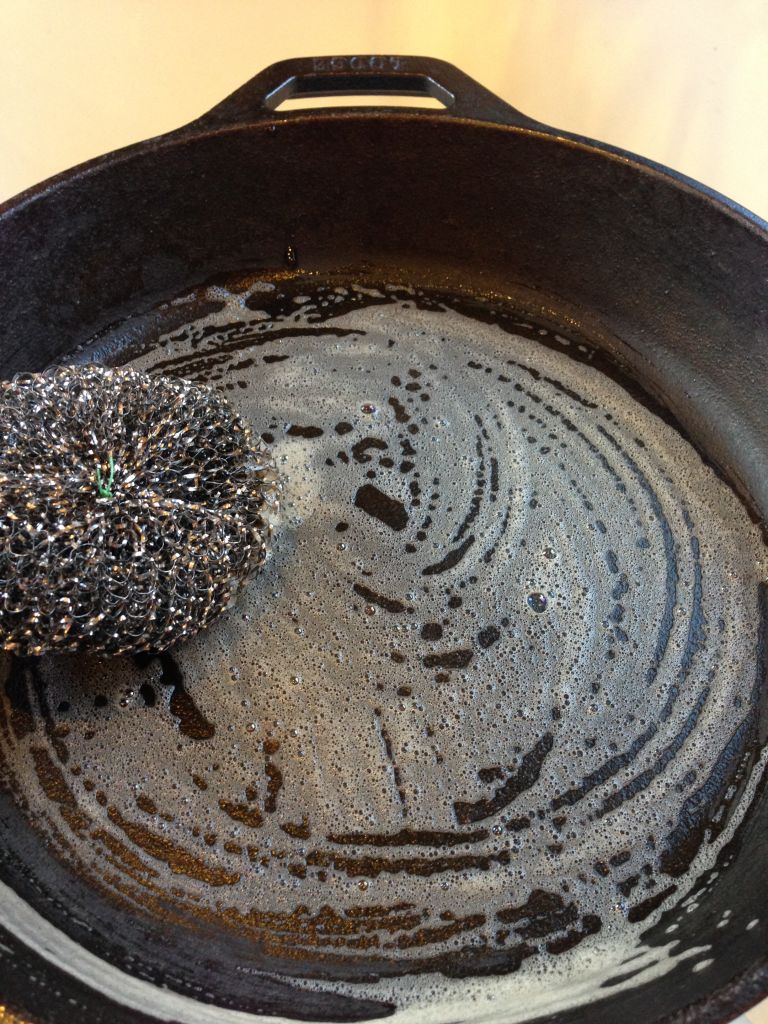
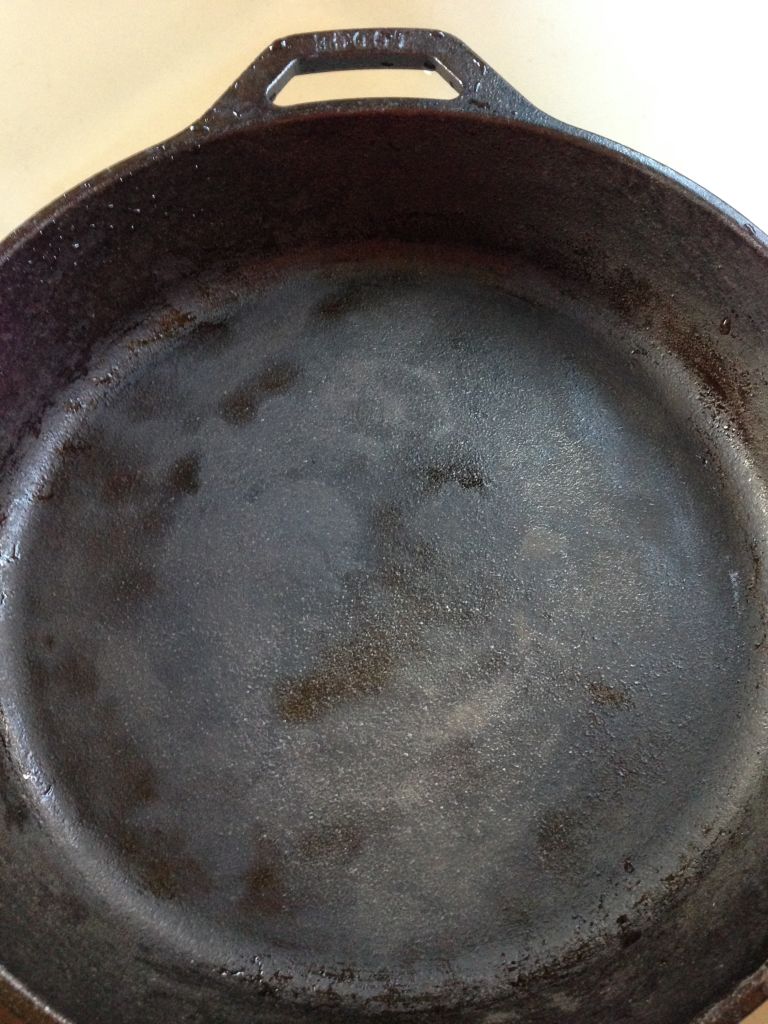
3. Wash the skillet with warm water and mild dish soap. Use a sponge if needed.
IMG_51694. Thoroughly dry the cast iron immediately with paper towels and then apply a small amount of cooking oil to the entire piece including handle and bottom.
IMG_51745. Place pan upside down in preheated oven (350 degrees). Put aluminum foil on the bottom to catch any drips.

IMG_5184

6. Heat the pan for one hour. Let the pan cool if you intend to use same day.

(I taught myself how to do this thanks to thekitchn.com!)

Pad Thai After A Long Day

I had a busy day on Tuesday with a few ups and downs, but the grounding moment was taking a breather at one of my favorite overlooks in the area. It’s Crissy Field right next to the Golden Gate Bridge. It was nice to relax for a minute and remember all of the reasons we came to this area. When I got home I was exhausted but craving something homemade. So I whipped up some shrimp pad thai. Then Jason and I watched Bad Grandpa and laughed our buns off.
IMG_5122

Shrimp Pad Thai
(Recipe inspiration from myrecipes.com)
8 oz uncooled flat rice noodles
3 tablespoons canola oil
1 cup green onion pieces
8 oz peeled and deveined large shrimp
4 garlic cloves, minced
10 oz bag of mixed asian vegetables (bean sprouts, carrots, broccoli, cabbage)
1/4 cup unsalted peanuts

Seasonings:
2 tablespoon brown sugar
2 tablespoons tamari (or soy sauce)
1 1/2 tablespoon chili and garlic sauce
1 1/2 tablespoon lime juice
1 1/2 tablespoon fish sauce

1. Cook noodles as stated on the package as well as combine all seasonings in a small bowl and set each aside.
2. Heat oil in a large wok over medium high heat. Add green onions and mixed vegetables. Par-cook vegetables and add garlic, being careful not to burn. Add shrimp and cook until it’s pink, and almost done cooking. Toss with seasonings and cook for one minute. Add noodles and cook again until heated through. Top with peanuts and serve.
IMG_5130

Beef, Beer, and Root Vegetables

I’m going to be busy this week with interviews and informational meetings. I made a stew for Jason to eat over the next few nights and it should make for scrumptious leftovers.

Beef and Root Vegetable Stew
3 tablespoons olive oil
1 tablespoon butter
2 lbs beef stew meat
3 cloves garlic, minced
1 medium onion, diced
1 bottle dark beer
4 cups beef broth
1 tablespoon Worcestershire sauce
3 tablespoons tomato paste
1 1/2 teaspoons sugar
1/2 teaspoon paprika
1/2 teaspoon kosher salt
Freshly ground black pepper
4 carrots, sliced
4 parsnips, sliced
4 turnips, diced
1 celery root, diced
2 tablespoons flour
Minced fresh parsley

DSC_0076

1. Heat oil and butter in pan and brown the beef. Remove the beef and liquid from pan.
DSC_0129 
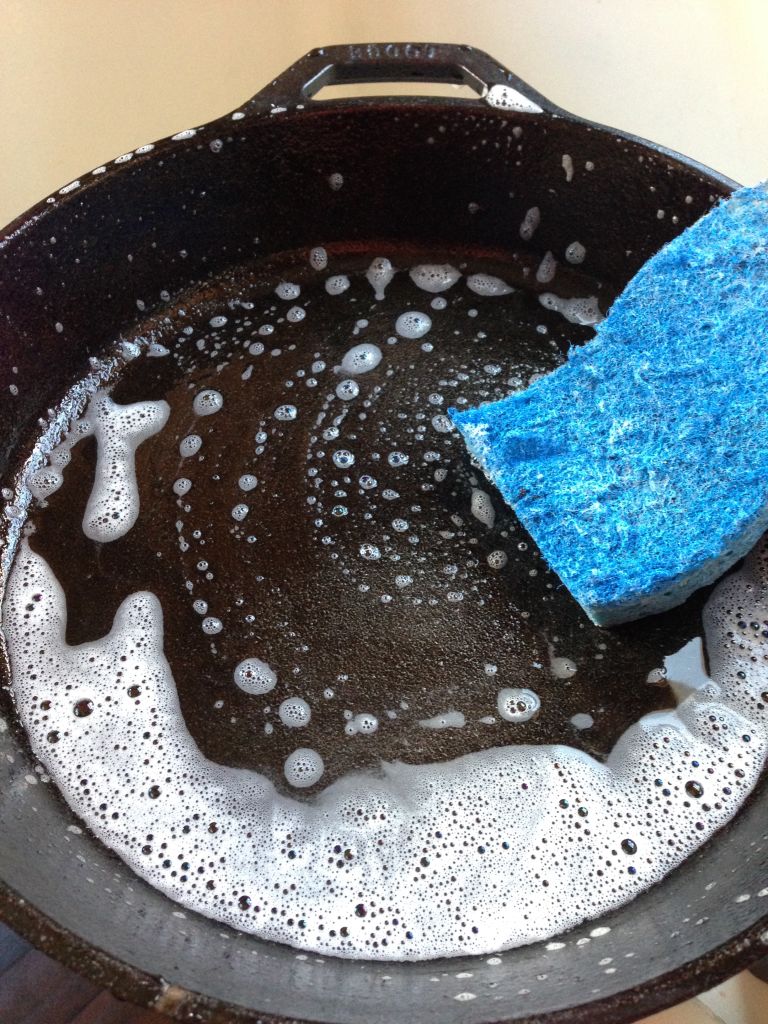
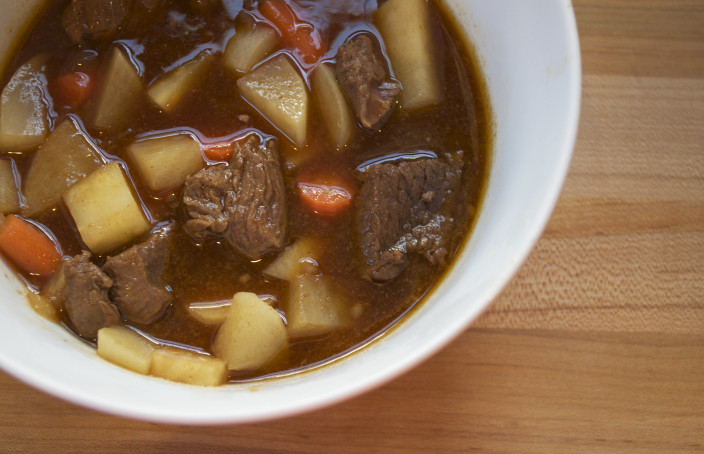
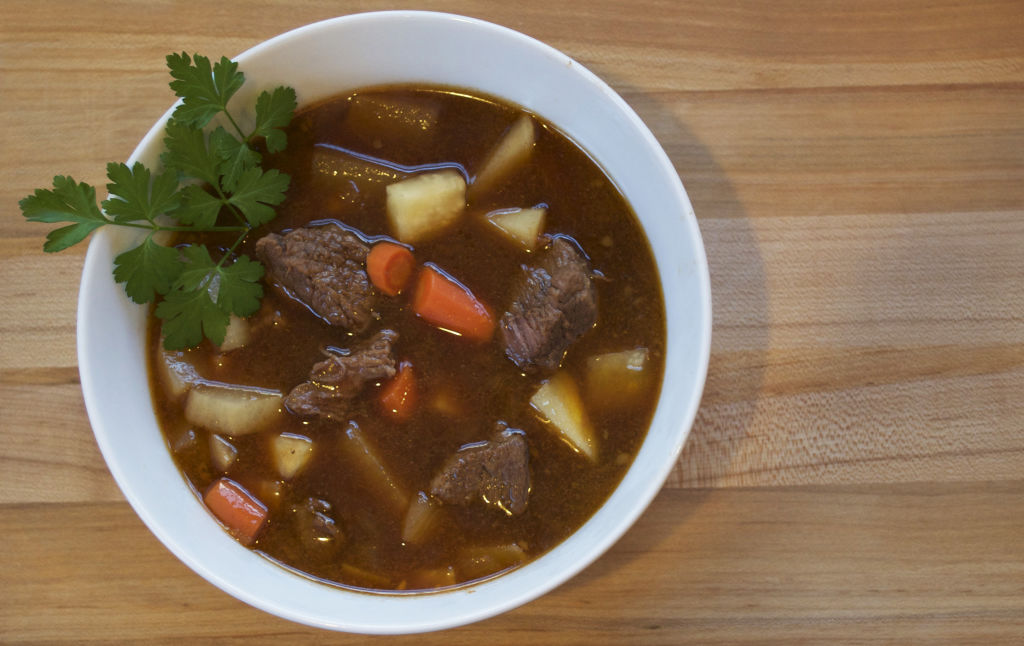
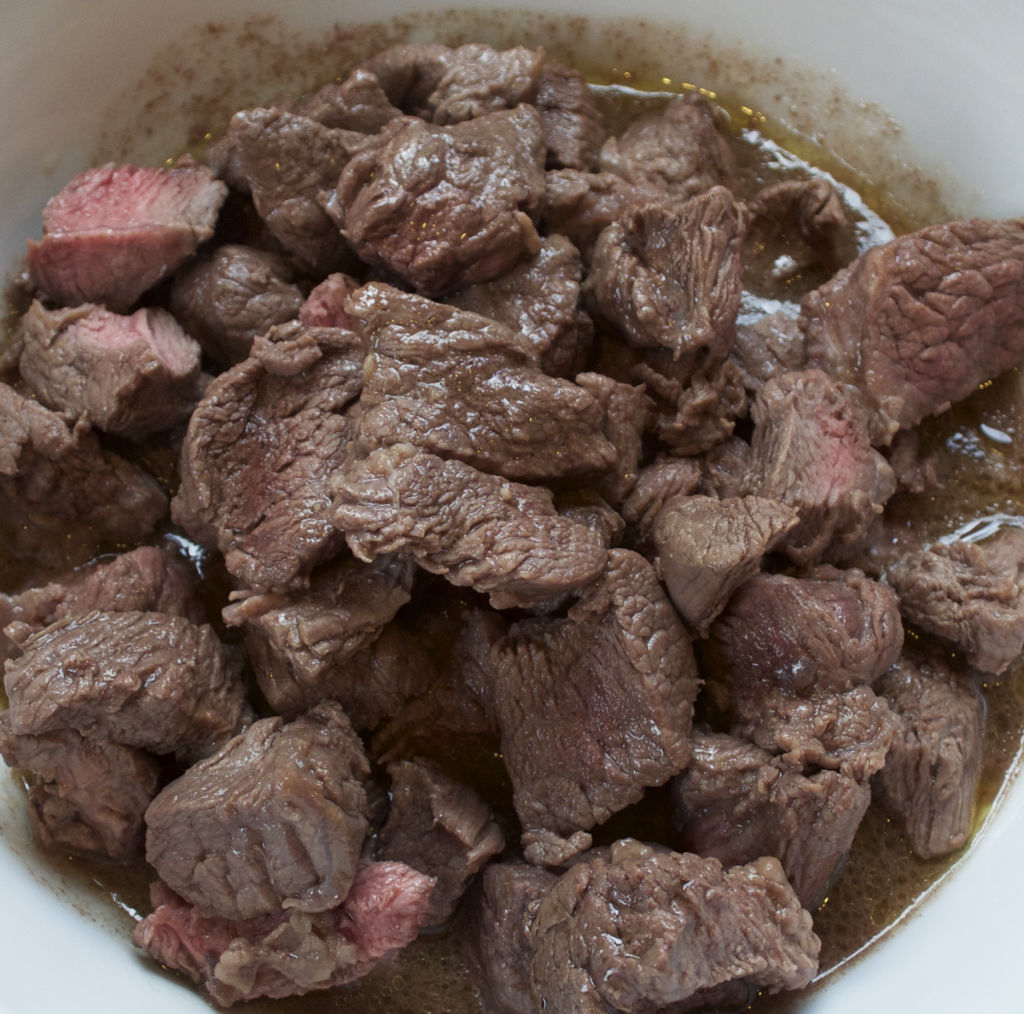
2. Put garlic and onions in pan until softened. Pour in the beer, beef broth, Worcestershire sauce, tomato paste, sugar, paprika, salt, and pepper.
3. Return the beef to the pan and simmer on low heat until very tender, 1 1/2 to 2 hours.
DSC_0142 
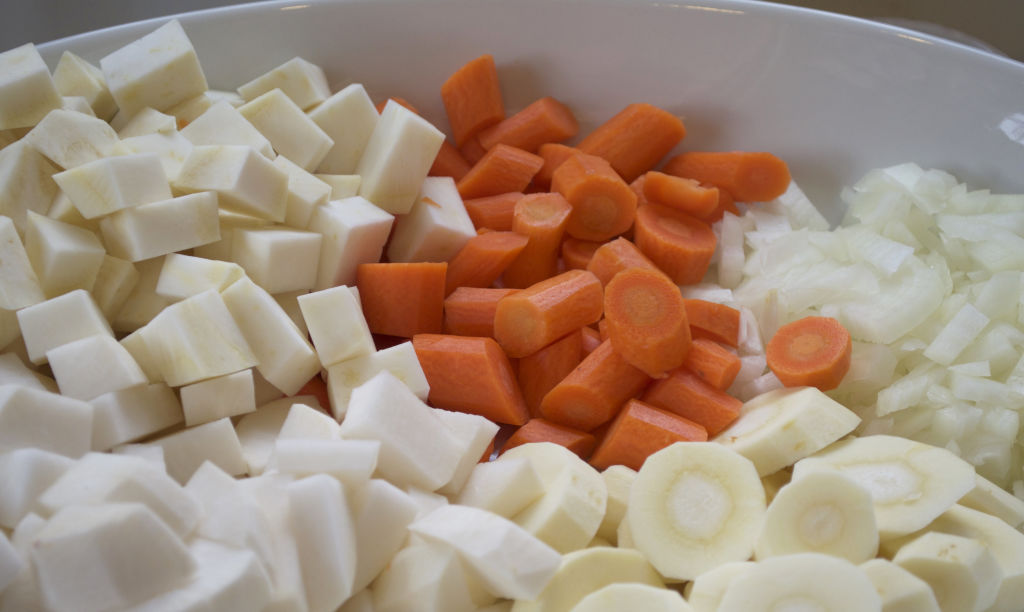
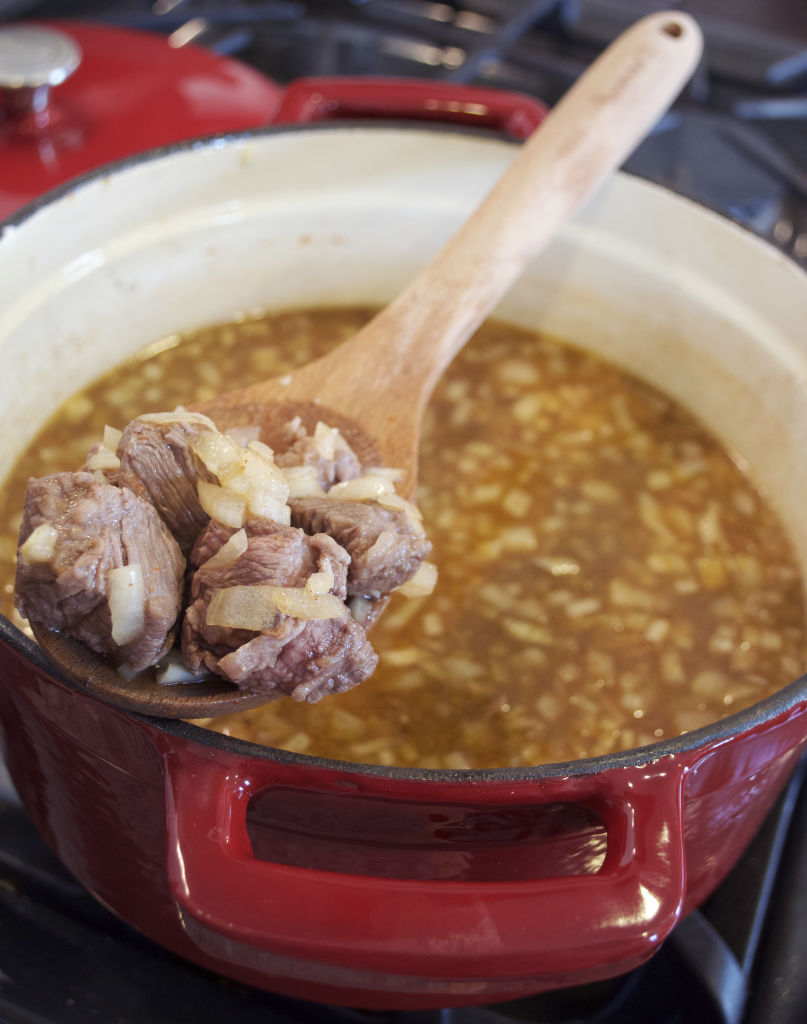
4. Add the carrots, parsnips, turnips, and celery root and simmer until the vegetables are tender and the liquid is reduced, about 30 minutes.DSC_0083

DSC_0096
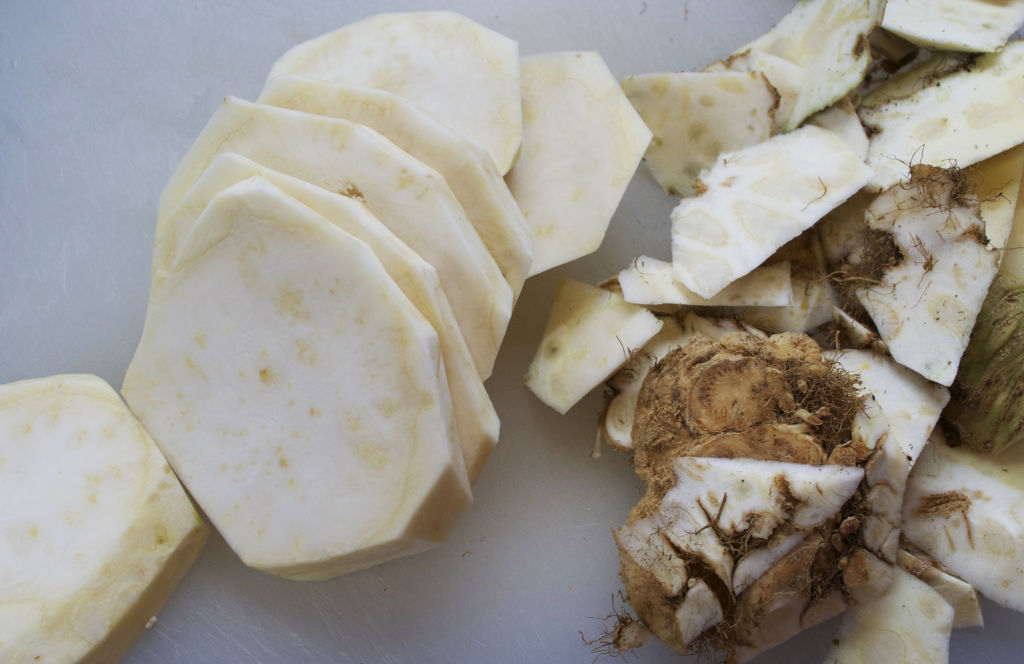
5. If the stew is too liquidy, remove a cup of liquid and stir in the flour. Add the flour mixture back into the pan and stir. Simmer for 10 more minutes.
6. To finish, add parsley and stir through stew.
DSC_0161

Copyright © 2018. Powered by A & E Cyber Publishers.