Tag - garlic

Zoodles: Take 1

A very dear friend gave me a Veggetti for my bridal shower last year. We drove across the country two days later to move to California. Needless to say, it’s taken some time to put all of these exciting gifts to use / remember where we put them when we moved. This is something I wish I’ve been using more frequently. Gluten free pasta is fine, don’t get me wrong. There are a few really good brands and at this point I really don’t miss “regular” pasta’s taste or consistency. Those gf pastas are just as terrible for you though, so this is a lovely and light way to get all the good fixings that you put in pasta, sans guilt. It’s a very tasty first take on zoodles and incredibly filling with so much veggie-chicken goodness! I prepared the asparagus and chicken the night ahead of time because I was making a different meal and just used the leftover pieces for this zoodles recipe.
DSC_0034

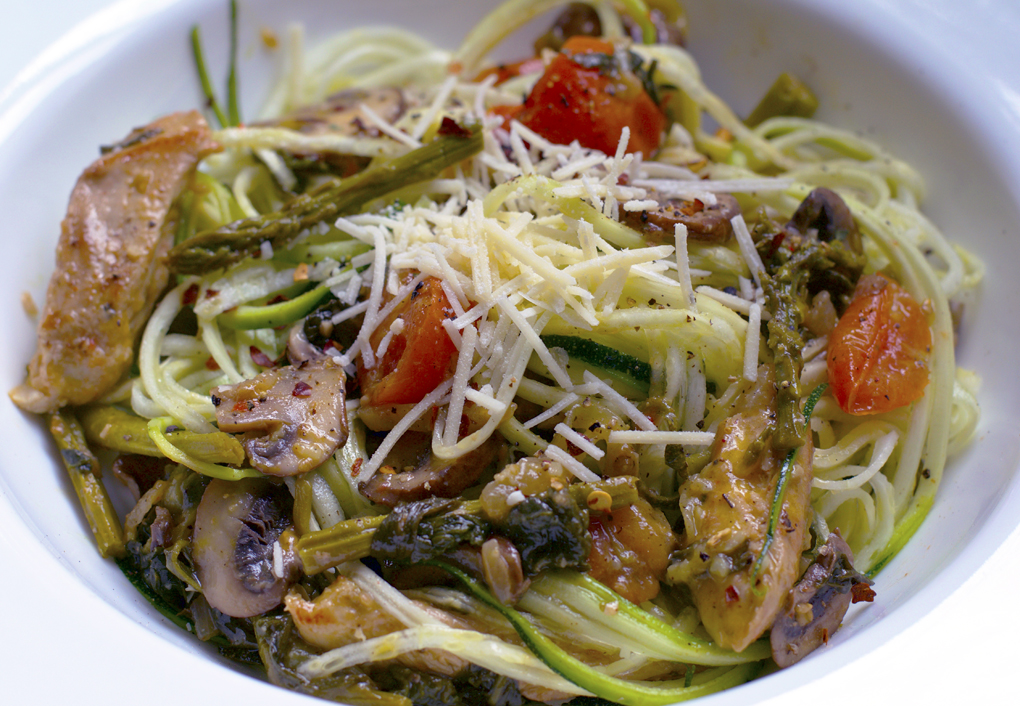
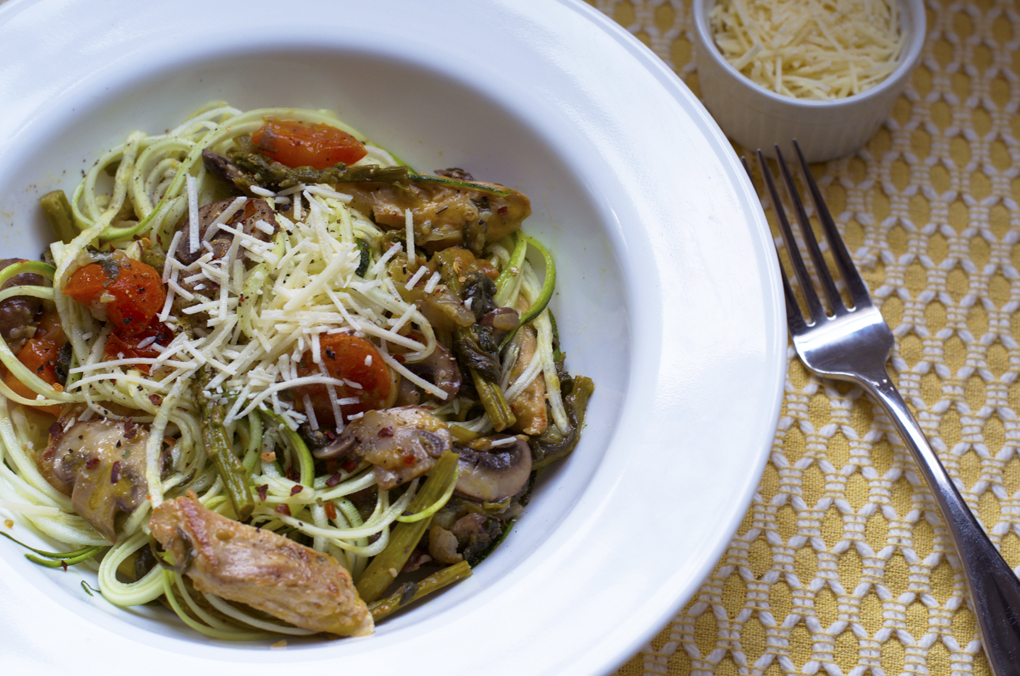
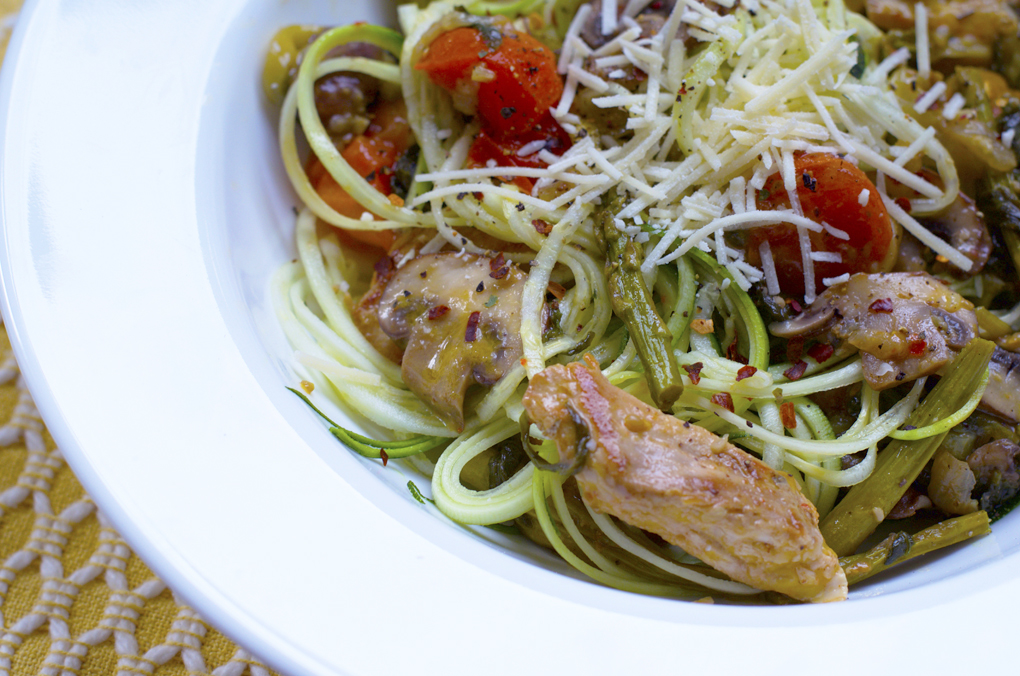
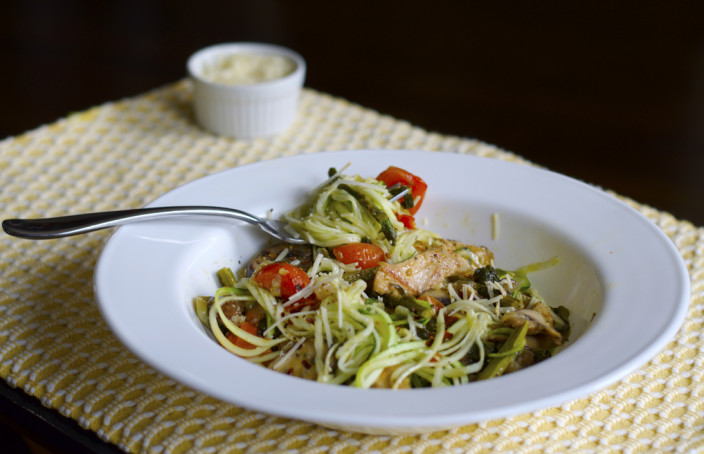
Zoodles with Chicken and Veggies
2 chicken breasts, prepared the night before (see first step)
1 bunch of asparagus, prepared the night before (see 2nd step)
Olive oil
12 mushrooms, sliced thin
1 small yellow onion, diced
6 oz spinach
3 cloves garlic
1 tablespoon butter
1 zucchini, “zoodled”
12 cherry tomatoes, halved
2 Tablespoons white wine
Red pepper flakes and parmesan cheese, for serving

1. The night before I cut the chicken into pieces and marinated in Italian dressing for a couple hours. Then sautéed until golden brown, and even a little burned in places. Set aside.

2. Cut tough ends off asparagus, lay flat on a roasting tray and coat with olive oil, salt, pepper, dash of cayenne, and garlic powder.  Roast in 425 degree oven for 8 minutes. Cut into bite size pieces and set aside.

3. Heat teaspoon of olive oil in pan and then sauté mushrooms and onions until beginning to caramelize. Season with salt and pepper.
DSC_0170

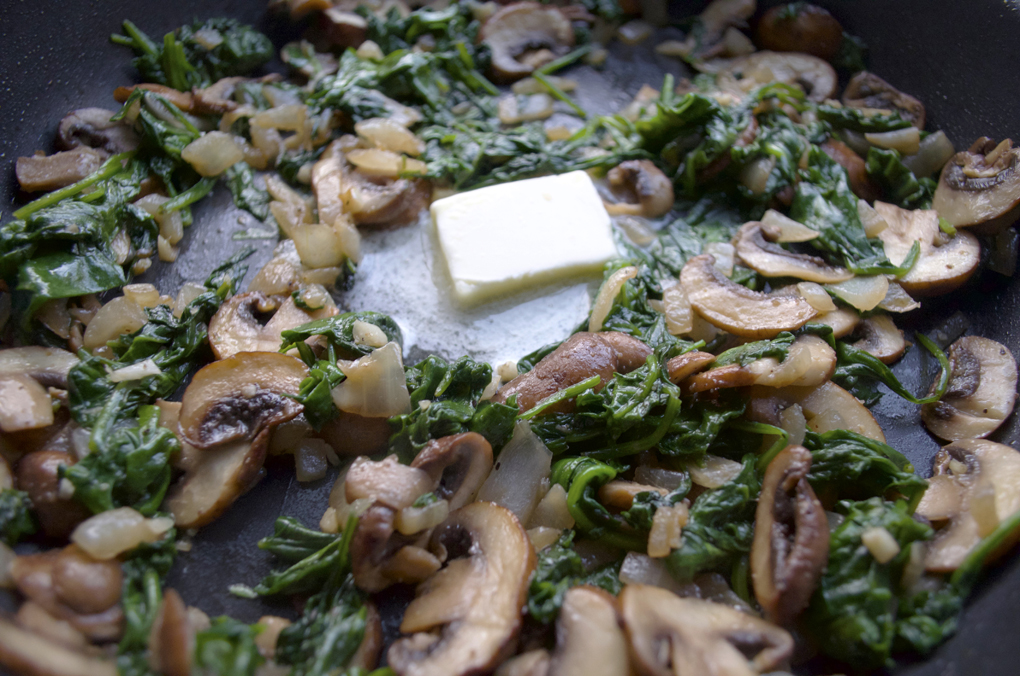
4. Add spinach and cook down until completed wilted. Add tablespoon of butter and ensure all veggies are coated. DSC_0179

5. Add cherry tomatoes, asparagus, and chicken. Bring to heat and then add white wine. Cook on medium heat until wine starts to boil and burn off, be sure to keep stirring so veggies don’t stick to the bottom. Add zoodles and cook until they are fully heated. No need to sauté or brown them.

DSC_0186

6. Serve with parmesan and red pepper flakes! DSC_0019

DSC_0010

Turkey Burgers and Sweet Potato Fries

It was not my intention to make such unnecessarily large burgers. I could have made 5 or 6 out of this recipe, as opposed to the 4 ginormous ones I created. They didn’t shrink as much as I thought they would. I’d also like to make more patties next time so the recipe can stretch out over more meals. You can also cook them on the grill but ours is so finicky that I didn’t feel like standing next to it all day making sure they didn’t burn to a crisp. The fries were also great the next day when I turned them into “hash browns” with breakfast. Leftovers love all day long.

Turkey Burgers and Sweet Potato Fries
1 lb ground turkey
1 small white onion, chopped
1/4 cup gluten free breadcrumbs
2 eggs, lightly beaten
2 cloves garlic, minced
1 teaspoon salt
1/2 teaspoon pepper
1 teaspoon olive oil
2 cups baby spinach
2 cloves garlic, chopped

3 sweet potatoes, peeled
1 teaspoon paprika
1 teaspoon salt
1/2 teaspoon pepper
1/2 teaspoon garlic powder

1. Cut sweet potatoes into 1/4 inch slices. Toss in a large bowl with spices and olive oil until all coated.

DSC_0030

DSC_0043

2. Lay potatoes in an even layer on a cooking sheet lined with parchment paper. Cook in 450 degree oven for 20 minutes, tossing occasionally.

DSC_0050

3. Combine turkey, onion, breadcrumbs, eggs, garlic, salt and pepper in a large bowl. Separate into burgers and either grill or pan fry until fully cooked. Set aside.
DSC_0013

DSC_0036

DSC_0018

4. Heat olive oil in a sauté pan and cook garlic until fragrant. Add spinach and cook until wilted. Set aside.

5. Assemble burgers with cheese, sautéed spinach and onion (maybe a tomato too, if you find one in your fridge.)

DSC_0103

6. Devour with delicious cider!

DSC_0141

Turkey and Spinach Meatballs

I have no idea what’s happening with our broccoli plants. They’re producing broccolini-type veggies now, but they’re just as tasty so that’s fine by me. They were delicious sautéed with sliced garlic and olive oil and perfect with this meatball recipe. The fennel in the turkey-spinach combo is a really nice touch but I will replace the spinach with fresh kale from the garden next time. Definitely a recipe to keep around, thanks to bon appetit again.

Turkey and Spinach Meatballs
2 slices of gluten free bread, toasted
1 1/2 lb ground turkey
1/2 cup chopped sweet vidalia onion
2 cloves garlic, chopped
2 Tablespoons Italian parsley, chopped
1 teaspoon fennel seeds
1/4 cup Parmesan cheese
8 oz package of frozen chopped spinach, defrosted and drained of excess moisture
1 large egg, slightly beaten
Salt and pepper
3 Tablespoons olive oil

1. Place toasted bread into a food processor and pulse until they turn into breadcrumbs. Use 1/2 cup for meatballs, keep the rest in an airtight container for the next recipe!

DSC_0236

DSC_0240

2. In a medium bowl, combine turkey, onion, garlic, parsley, fennel, parmesan, spinach, salt, pepper, breadcrumbs, and egg. Roll into meatballs, approximately 16.

DSC_0270

DSC_0279

3. Heat olive oil in a skillet and cook meatballs for about 3-4 minutes on each side until golden brown and cooked through. Do not crowd the skillet, you will probably have to cook in batches. Once one batch is done, place on a paper towel covered plate to remove excess oil.

DSC_0293

DSC_0312

4. Serve with broccoli and marinara sauce.

DSC_0520

DSC_0506

Chicken Tikka Masala

This recipe makes a lot of food! Our landlord and two of her friends came over and it was enough for the five of us to have decent portions. Everyone really enjoyed it and asked for seconds, which is usually a good sign. As a first attempt at making an Indian dish, this came out great. Next time I will serve it with basmati rice instead of brown rice. The chicken might also be better if marinated for a bit longer, I only had an hour to do it so I might put it in the fridge overnight next time.

Chicken Tikka Masala
(Recipe inspiration from bon appetit)
2 lbs boneless skinless chicken breasts, cut into bite size pieces
2 teaspoons kosher salt
1 teaspoon pepper
1 cup whole milk yogurt (not greek)
6 garlic cloves, minced
4 teaspoons ginger, finely grated
4 teaspoons turmeric
2 teaspoons garam masala
2 teaspoons ground coriander
2 teaspoons ground cumin
3 Tablespoons canola oil
1 small onion, diced
1/4 cup tomato paste
6 cardamom pods, crushed
1 teaspoon chili pepper flakes
1 28-ounce can whole peeled tomatoes, crushed by hand
2 cups heavy cream
Fresh cilantro and brown or basmati rice, for serving

1. Season chicken with salt and pepper. In a large bowl, combine yogurt, garlic, ginger, turmeric, garam masala, coriander, and cumin. Cover with plastic wrap and marinate for one hour, overnight if possible.

DSC_0350

2. In a large dutch oven, heat oil and add onion, tomato paste and pods. Heat until onions begin to soften.

3. While the onions are doing their thing, heat the oven to broil. Place chicken on a wire rack on top of a aluminum foil lined baking sheet. Broil for approximately 10 minutes. The chicken should become crispy but not necessarily fully cooked inside.

DSC_0382

4. Add tomatoes to the pot, crushing them and adding all of the tomato juice to the pot. Bring to a boil then reduce to a simmer and allow the sauce to thicken, stirring occasionally.

DSC_0395

5. Once the sauce has thickened, add the chicken to the pot and stir in cream. Keep simmering until the chicken is cooked through completely, approximately 8-10 minutes.

DSC_0399

6. Serve with rice and enjoy with your neighbors!

DSC_0273

Pickles!

There are always pickles in the refrigerator in our house. Home from work and need something to tie you over until dinner? Eat a pickle. Finished lunch but it wasn’t quite filling enough and you’re hungry an hour later? Eat a pickle. Purchased 12 mason jars and want to figure out how to start canning? Eat Make a pickle.

I really enjoyed this pickling process and it’s very customizable. It’s a bit time consuming, but not difficult. The hardest part is waiting to see if they’re good! I plan to open the first jar a week after canning to see how the flavor is, if it’s a bit weak, I’ll open the other jars sporadically to see what the sweet spot is. Boiling these jars as a last step is what makes them shelf stable and will allow them to last that long. An update shall come in a few days to determine the success or failure of this recipe.

Pickles!
4 mason jars
3 cups filtered water
3 cups apple cider vinegar
1/2 cup coarse salt
3 Tablespoons of fresh dill, chopped
2 Teaspoons red chili flakes
6 cloves garlic, sliced
2 Tablespoons mustard seeds
2 Tablespoons black pepper seeds

1. Wash jars and lids with soap and water. Boil in water to sterilize, if desired.

DSC_0019

2. Combine water, vinegar, and salt in a saucepan. Bring to a boil until the salt dissolves to create a brine.

3. Equally distribute the dill, chili flakes, garlic, mustard and pepper seeds into four mason jars.

DSC_0065

DSC_0057

4. Cut up the cucumbers as desired, I used spears and chips. Place them into jars without over crowding.

DSC_0080

5. Pour the brine over the pickles, leaving a quarter of an inch from the top of the jar.

DSC_0083

6. Place the tops on and close, but not too tight. Place jars into a large pot of boiling water, making sure the jars are completely covered. Boil for 10 minutes, then remove and put aside to cool.  DSC_0154

Copyright © 2018. Powered by A & E Cyber Publishers.